FAQ > Back Glass > Ford Pickup Back Glass Leaks


Starting
in
about
1997
some
Small
and
Full
Size
Ford
Pick-ups
began
having
water
leak
issues.
Since
then
we
have
had
so
many
people
come
into
our
Service
Center
inquiring
about
the
problem
we’ve
taken
the
time
to
create
this
in
depth
page.
Your
vehicles
problem
is
more
than
likely
related
to
1
or
all
5
of
the
probable
water
leak
issues
we
have
seen
in
these
trucks.
Water
flows
onto
and
then
down
the
cab
so
we'll
start
at
the
top
and
work our way down.

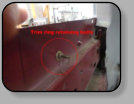
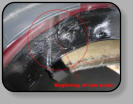
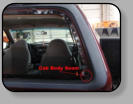
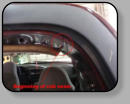
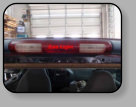
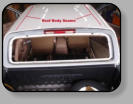
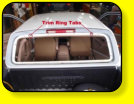
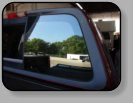
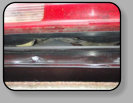
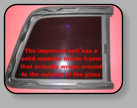
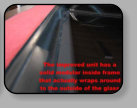
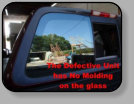
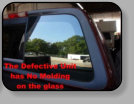
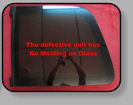
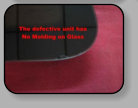
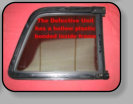
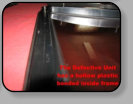
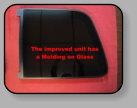
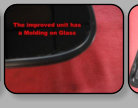
Ford's later designed back glass
These
window
units
are
fantastic
in
that
we
have
seen
no
issues
with
them
since
they
came to be in 1998.
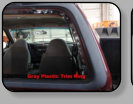
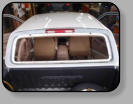



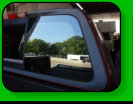


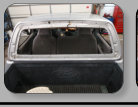
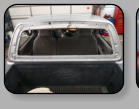

* This is the most common leak for these vehicles *

The bill for that mistake by the time it's all said and done, will come in at over $1,000.00 at today’s
(2018) current prices. Add a possible paint job to the cost of the repair
and well I'm sure you get the picture.
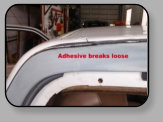
1. The plastic trim ring (expands and contracts) at a different rate than the window unit and the sheet
metal cab causing it to tear loose.
2. UV Rays from the sun will break down the adhesive in about 3 months, if you are lucky and it lasts that
long, and then you will really have a mess on your hands.
3. To make the vehicle right again you'll need a new window, a new trim ring, and a new 3rd brake light.


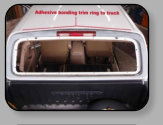
1. Do not! seal the trim ring to the cab.
2. Do not! seal the 3rd brake light to the trim ring.
3. Do Not! seal the trim ring to the window unit.
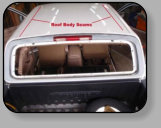
If it's in fact found to be the water is entering from the body seams on the roof.
Do
Not!
apply
any
type
of
body
seam
sealer
on
them
(no
matter
what
it
says
in
the
directions
on
the
tube)
without
painting
a
(UV
Resistant)
automotive
top
coat
over
the
adhesive.
If
this
isn't
done
the
UV
Rays
from
the
sun
will
in
fact
break
the
adhesive
down
and
it
will
roll
right
off
in
a
very
short
time.
We
have
seen
this
many
times
and
it
usually
results in the vehicle needing to be repainted.

If your a DIY person here’s what NOT TO DO!
If you have a 1997/98 model
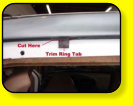
There is a slight easily done modification required to the grey plastic trim ring in order for this window to be installed in it. There are
two tabs that protrude down from the grey trim ring at the top of the window opening that must be removed.
Photos that show how to determine whether or not you
have Ford’s early designed problem unit.

We should also mention that these types of window units are still in the market place. Whether your replacing your glass due to a
water leak or due to window breakage, do not purchase one of these types of window units.
5.
Water
can
be
entering
the
cab
though
the
back
glass
unit
(itself) through small cracks in the plastic.
Whatever
type
of
material
Ford
used
in
this
design
certainly
didn't
make
the
cut
quality
wise
that
we
are
sure
the
designers
had
intended
for
them
to
have.
We
have
also
seen
similar
problems
with
some
of
the
past
era
back
glass
units
General
motors
put
into
service.
The
GM
units
we
have
seen
were
even
worse
in
that
when
they cracked it created a gap sometimes as large as a 1/4 inch wide.
This particular 1997 model Ford pick-up uses a poorly designed rear window (be it stationary or sliding) that had major issues.
Ford
shortly
afterwards
came
out
with
a
revised
window
that
solved
the
problem.
To
our
knowledge
Ford
did
not
actually
recall
these
poorly
designed
window
units,
they
just
happened
to
replace
them
with
a
new
and
improved
type
of
window
unit
with
a
totally
different
type of construction.
If
you
have
this
type
of
unit
installed
in
your
vehicle
(and
it
does
in
fact
prove
to
be
that
the
water
is
entering
between
the
unit
and
the
seal to the cab) unfortunately you are still looking at having to purchase a new window unit.
The
problem
now
is
that
the
unit
is
installed
with
a
bubble
gum
like
adhesive
called
foam
core
butyl
tape.
This
adhesive
is
extremely
limber
in
that
as
you
try
and
cut
through
it,
it
re-adheres
to
itself.
In
addition
to
that
problem
you
cannot
access
the
adhesive
to
cut
it
where
the
nine
or
so
bolts
go
through
the
cab
from
the
unit.
All
one
can
do
is
apply
extreme
outward
pressure
to
the
window
unit
and
cut
the
adhesive
as
it
allows
access
to
it.
What
this
does
as
a
rule
is
that
it
flexes
the
window
units
brittle
inner
plastic
frame
causing,
at
best, small unseen micro cracks and at worst large gaping cracks.
The
bottom
line
is
that
reusing
this
type
of
unit
no
matter
how
good
it
looks
after
it's
removed
is
not
recommended.
Even
if
the
removal
of
the
unit
appears
to
have
went
well,
the
stress
placed
on
the
unit
during
the
R&R
procedure
helps
accelerate
the
plastic
frames
cracking process it does on its own.
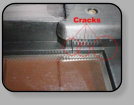
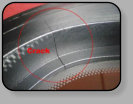
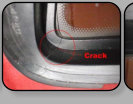
4. Water can be entering the cab through the seal
between the back glass unit and the vehicles pinchweld.


Water entering the cab anywhere above (body seam, trim ring, 3rd brake light) the pinchweld can exit from between these two
layers, between the spot welds, and make it appear that it is leaking from the glass seal.
There's a very fine line to look at between the two spots so be sure of what you are seeing.
There's nothing like assuming it's the window and some 3 hours and a bunch of hard earned dollars later find out that you still
have a water leak and find yourself back at square one.
The
pinchweld
is
actually
constructed
in
two
different
layers.
The
layer
on
the
outside
is
the
one
the
window
unit
is
actually
bonded
to.
The
outside
pinchweld
layer is attached to the second layer by spot welds.
3.
Water
can
be
entering
the
cab
through
a
body
seam.
Once
again
make
note
that
the
pinchweld
body
seems
also
run
up
to
the
top
corner
of
the
cab
under
the
plastic
trim
ring
which
could
be
where
the
water is entering.
If
the
trim
ring
mounting
holes
look
ok,
it
may
be
that
there
is
a
body
seem
hole
under
the
trim
ring.
The
only
way
to
absolutely
find
out
is
to
R&R
the
trim
ring
which
will
require removing the window unit as it lays on top of the trim ring inner flange.
2.
Water
can
be
entering
the
cab
through
the
grey
plastic
trim
ring
where
one
or
more
of
the
16
foam
gasket
sealed
alignment
pins,
clips
and
mounting
bolts
that
attach
it
to
the
cab.
It
may
be
possible
to
seal
the
bolt
hole
by
removing
the
nut,
apply
sealer
to
the hole and replace the nut.
1.
Water
can
be
entering
the
cab
through
the
3rd
brake
light
gasket.
We
have
seen
several
of
these
lights
warped
from
heat
producing
an
opening
between
the light and the gasket.

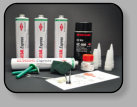

If
you
decide
to
remove
and
replace
your
rear
back
glass
window
unit
yourself
be
sure
to
use
the
proper
pinchweld
and
window
unit
primers
on
both
bonding
surfaces
as
well
as
be
sure
to
allow
the
proper
flash
times
or
you
won't
achieve
a
proper
bond
to
one
or
both
surfaces.


Copyright 2013 © Phoenix Glass, Inc. All Rights Reserved
Revised June 2023
Please Like Us
on Facebook

click the link below and it will take you to a video we have
posted on YouTube where you can watch us do a water test
on our Ford Ranger service truck. This water leak test video
was done on a pick up truck but you can apply the procedure
and methods to do a water leak test on any type of vehicle. If
you call us about a leak in one of these trucks the first thing
we’re going to ask you is, did you watch our video about it so
pay attention because there’s going to be a test lol
If your having water leak issues on a 1994 to 2012
Ford Ranger or a Mazda Pick up truck
Doing this not only looks bad but it won't last!


